Day 28
Scroll down to see intro to pyro notes.
When I came into the office, opened firefox on a workstation and visited this blog. The first thing I saw was the schedule and took note of the remaining weeks I have.
That's when I went omgwtfbbq.
I'm wasting no time today perfecting animations and texturing stuff. I can do that whenever where ever.
Okay not really where ever but you get what I mean.
Today I shall start off my pyro simulation tests and also I shall add some upgrades to my sprite particles.
I'll get Evan to look at my finalized animation one last time to officially announce it finalized.
-----
It's 5.48pm now.
I've just spent the whole day watching recorded pyro fx lectures.
Even though I roughly know the basics of pyro, it's just roughly and not thorough.
Thus I took down as much notes as I could while grasping all the awesome knowledge like a greedy cg grunt.
For anyone who is interested in learning pyro in houdini for the first time, feel free to take a look at this.
-
INTRO TO PYRO
Software: Houdini 11
TIP: Turn off all noise for beginners in pyro to see how the fundamentals actually work.
Voxels - 2D pixels that store colour information on a 2D image or 3D cubes that store colour data within a fluid/ gas/ pyro container in 3D space.
Field - The data that is being stored at the voxel locations.
Uniform Divisions - Decides the resolution of the simulation. Default value 50 is very low, 100 is good enough for prototyping.
Visualization Tab
Density - Renders out as smoke.
Heat - Renders out as fire.
Fuel - Needed for combustion to occur and has ignition threshold temperature.
If temperature at a voxel of fuel is higher than ignition temperature, combustion will occur and it will emit smoke. It will also release heat, gas and density. Basically the whole simulation will occur due to fuel thus making fuel very important!
Difference between Hurn and Heat
Burn - Fuel that is combusting at the current moment.
Heat - Product of the combustion releasing heat into the simulation. Based on buoyancy, heat is being advected into the scene.
Fuel => Burn => Heat
To get the good looks
Make sure the heat and density look good in simulation. If heat and density look good in simulation but not in renders, it means the shader must be tweaked.
The simulation data is always the look you want, once fields look good, it's good.
AutoDopNetwork - Pyrosolver
3 main tabs - Sources, Simulation & Advanced.
AutoDopNetwork - Pyrosolver - Sources
Emitters
Emit Fuel - Object is emitter for fuel. Value of fuel amount = multiplication of original fuel amount. More fuel, bigger explosion!
Emit Smoke- Turned off because combustion is already emitting smoke. Turning this on would cause smoke to be emitted from object.
Scale Temperature - Controls how fast fire will rise. Hotter = faster. (It multiplies the original temperature value located in apply-source.)
Noise
Has a 4th dimension - Time.
Prevents pyro simulation from looking too uniformed and makes fire look more chaotic like how it should be.
Gives more variation in fire simulations.
Noise is being emitted from the object. (Can be visualized by checking source in visualization tab)
Ramp can be adjusted and remapped to change noise adjustments and shape.
Note: Candle flames don't need noise since the candle light is calm.
AutoDopNetwork - Pyrosolver - Simulation
Limit Speed - Limits speed of simulation. Use if simulation is going too fast.
Viscosity - Thick volumes of stuff. Not really needed for fire.
Cooling Rate: After 1 second, temperature or voxel field that has a value of 1, after 1 second, it will drop to a value of 90% of that value.
Higher cooling rate gives you more detail on fire. Very high cooling rate example value is 0.01, opposite of what you think. So lower value means higher rate.
Buoyancy: When you have a fluid or gas that has decent high temperature, it looks at the ambient temperature around itself and notices that if it is hotter than the ambient temperature, it will rise.
Buoyancy Lift - Lifts up the simulation process much faster.
Why not just crank up temperature? Because they all work together.
Temperature gives you an initial boost in the beginning.
Buoyancy however is the way gas reacts in reference to the voxel container. (surrounding environment)
Buoyancy Direction - Direction of Buoyancy Lift.
Vortex Confinement - Does the same thing as vorticles but in a slightly different way. It causes simulation to have a little more turbulence in the parts that have turbulence. Always use this as it's good for huge explosions.
Note: Too high vortex confinement will make simulation unstable.
Velocity Damp - Damps velocity field. Use if velocity is going too fast.
Fuel Tab
Advect or don't advect fuel.
If it's turned on, fuel travels along with density and rest of the fields like how it should. Always use for fire.
Fuel Speed - Value of 1 would emit fuel almost exactly like density. 1 is normally too much of a value.
Combustion Tab
One of the most important tabs in the whole pyrosolver. This is where combustion occurs.
Ignition Temperature: Decides at which temperature simulation is allowed to ignite. It looks at a voxel and if there's fuel in the voxel, it checks if the temperature is higher than the ignition temperature at the voxel. If it is, go into combustion. This occurs at each voxel.
Note: If ignition temperature value is negative, all fuel will instantly ignite.
Burn Rate - The amount of fuel to burn per second. It's a ratio, meaning that at value 0.9, after 1 second, 90% of the fuel will be burnt, leaving 0.1 fuel as leftover.
Burn Rate controls Burn Field, rate at which it burns. Value = amount of fuel to burn per second.
Inefficiency - Gives randomness to the Burning Rate, an uneven sense of fuel burning.
Soot Smoke Rate - Rate of smoke emission. Higher value, more smoke emitted.
Temperature Output - Amount to increase temperature field by. Temperature will go up to the value when combustion is occurring.
Gas Released - Causes density to push out, equivalent to gas pressure.
Heat Source - Burn default recommended.
Heat Cool Time - Time in seconds taken for temperature at voxel to go from value of 1 to 0.
Diffusion Tab
Applies Gaussian blur to the field data (temperature, fuel, density) of a radius of whatever value is in this tab.
Turbulence Tab
Turbulence: Turbulence within whole container domain, manipulating fire simulation. Gives simulation curvy wavy looks.
Scale - Controls how much or little turbulence is affecting simulation. Control differs on how big simulation is.
Bigger simulation = bigger turbulence scale
4th Dimension = Time
Mappings - Remap where turbulence is in turbulence fields.
Forces Tab
Global forces controller for all forces in pyro simulation including gravity.
This applies more force to all force attributes.
Can be remapped like turbulence for more artistic control.
AutoDopNetwork - Apply_source
Sets up some basic source relationships for emitter.
Also has it's own visualization - Guide => Density & SDF
SOP Path & OBJ Path - Object which simulation is emitted from.
Noise - Noise in apply_source multiplies noise from simulation tab. Not recommended for test simulations due to confusion.
Feathering - Blurs out the emitter.
Attribute - For intermediate attribute creation or modifications.
Physical - Temperature: Original temperature value.
Override Velocity - For velocity modifications. Customize using motion effects or others. Controls initial velocity & emission boost time.
SDF Generation
SDF: Signed Distance Field
Value of 1 inside sphere, -1 outside sphere, 0 directly at the surface of the sphere.
Kinda like the distance of the surface which calculates the volume of the geometry.
Note: If source object is moving, check use deforming geometry.
Check Build From Particles - Emit simulation using particle system by using particles as source. Each particles will have fuel, density, heat etc emitting from it. Emission amount can be controlled using Particle to Field (Scale by Voxel Volume) tab.
UPRES PYRO
Use for finer details.
UPRES - Takes low resolution simulation motion and converts it to high resolution. Simulation performs way faster than when increasing the amount of uniform divisions.
Switch_simulationmode
Low Res: Low Res
Both : Does low res than high res afterward, 1 frame at a time.
Up Res : Up Res
What's the best way to up res pyro?
Go into low res pyro obj
Export to File (Just like rendering)
1) Cache, cooks & exports out low res pyro simulation.
2) Once done, check load from disk.
3) Turn off low res obj, turn on up res obj.
4) Go into up res pyro obj - Render & cache up res simulation. Use this for final rendering. (Note: Rename output files to prevent overwrite issues.)
Note: In AutoDopNetwork, go to upres pyro visualization & crank up uniform divisions. Usually recommended use values of low res divisions multiplied by 2 to 3 times.
e.g. low res divisions = 50 thus, high res divisions = 100 or 150
Rendering
Depth Map Shadows
Crank up pixel samples if pyro simulation shadows screw up.
Mantra Node
Sampling Tab - Volume Step Size controls quality of render for volumed simulations.
Wednesday, July 20, 2011

Tuesday, July 19, 2011
Day 27
New explosion references I found for the project:
Javelin Missile In Action
http://www.youtube.com/watch?v=x6_JpPvWCAQ&feature=related
Hellfire Missile
http://www.youtube.com/watch?v=aU1ukWWOFqg
Tomahawk Missile Variants
http://www.youtube.com/watch?v=19XXTArAGaM
'NATO' missile strike caught on video, Libya rebels targeted
http://www.youtube.com/watch?v=KKtuegVouaI
Terrifying Air Strike in Brega Libya
http://www.youtube.com/watch?v=pK7dT0wO4CM&feature=related
North American F86D Sabre Dog bombed with napalm
http://www.youtube.com/watch?v=IJzb2xysvtg&feature=fvwrel
Republic F-105 Thunderchief guns down QF-80 Drone
http://www.youtube.com/watch?v=MKxz4koY9RE&feature=relmfu
Rocket Explosion
http://www.youtube.com/watch?v=gL1xUWgBlFw
Nuclear Underground Detonation
http://www.youtube.com/watch?v=ca4D0-s8OsI&feature=related
I've starting doing some shader building tests.
The batch render I mentioned in the previous post is still going on as it crashed at frame 480 in the middle of the night.
-----
Right now I'm playing around with the lighting setup of the scene.
That's when I realized I might need to add in ambient occlusion after much test renders and observations of the shadows on the apache
Also I might need to tweak the amount of xform time samples, increasing the "roundness" of the motion blurred propellers. I've already set the value to 25 but it seems like it's not really enough.


New explosion references I found for the project:
Javelin Missile In Action
http://www.youtube.com/watch?v=x6_JpPvWCAQ&feature=related
Hellfire Missile
http://www.youtube.com/watch?v=aU1ukWWOFqg
Tomahawk Missile Variants
http://www.youtube.com/watch?v=19XXTArAGaM
'NATO' missile strike caught on video, Libya rebels targeted
http://www.youtube.com/watch?v=KKtuegVouaI
Terrifying Air Strike in Brega Libya
http://www.youtube.com/watch?v=pK7dT0wO4CM&feature=related
North American F86D Sabre Dog bombed with napalm
http://www.youtube.com/watch?v=IJzb2xysvtg&feature=fvwrel
Republic F-105 Thunderchief guns down QF-80 Drone
http://www.youtube.com/watch?v=MKxz4koY9RE&feature=relmfu
Rocket Explosion
http://www.youtube.com/watch?v=gL1xUWgBlFw
Nuclear Underground Detonation
http://www.youtube.com/watch?v=ca4D0-s8OsI&feature=related
I've starting doing some shader building tests.
The batch render I mentioned in the previous post is still going on as it crashed at frame 480 in the middle of the night.
-----
Right now I'm playing around with the lighting setup of the scene.
That's when I realized I might need to add in ambient occlusion after much test renders and observations of the shadows on the apache
Also I might need to tweak the amount of xform time samples, increasing the "roundness" of the motion blurred propellers. I've already set the value to 25 but it seems like it's not really enough.

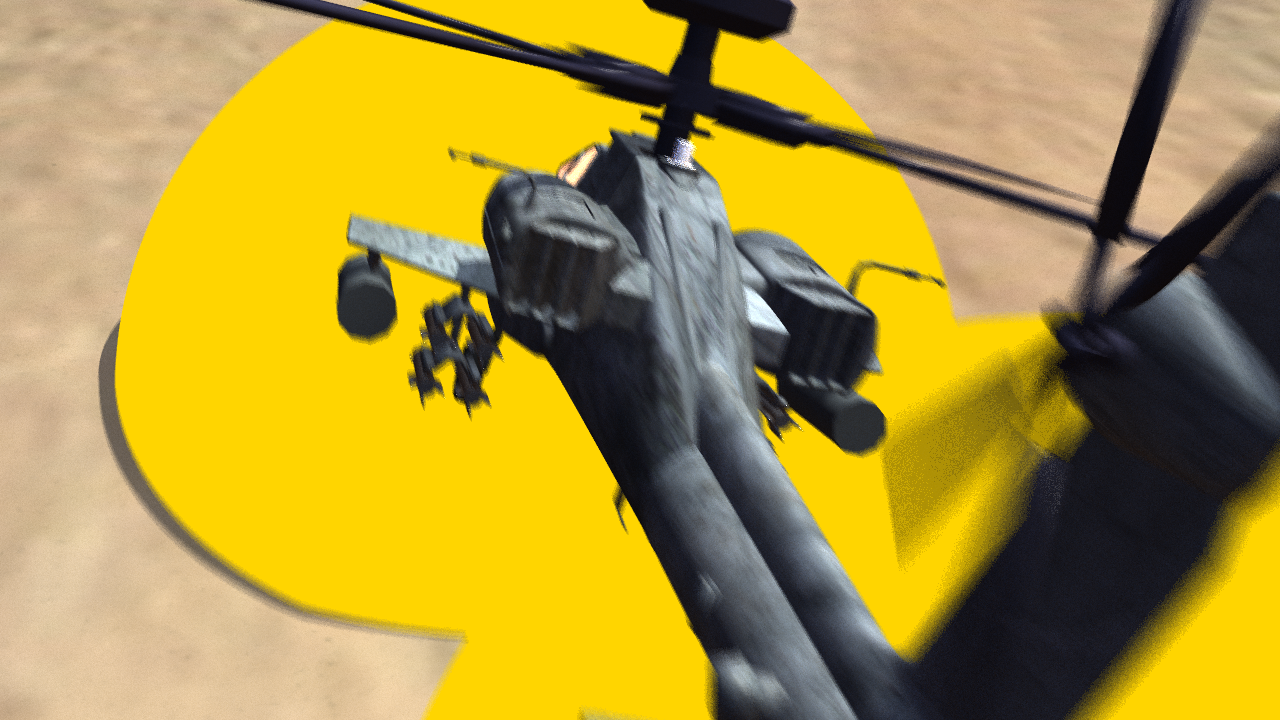
Okay looks like when I enable the sprite particles under these lighting settings they become over-exposed.


Looks like some plans have been changed due to that. I'll finalize the overall lighting by this week before I tweak and edit particles and simulations.
In other words I won't touch any particles or simulation effects until next week when my lighting is done.
----
Okay now for the rendering of the terrain. So far the renders seem to be looking good but the terrain hasn't reached the realistic stage yet.


Now I shall continue doing more test lightings and textures while I'm waiting for the work station to finish batch rendering my test sequence.
Monday, July 18, 2011
Day 26
Today started off with us being caught on camera.
We're not supposed to park bikes at that area!

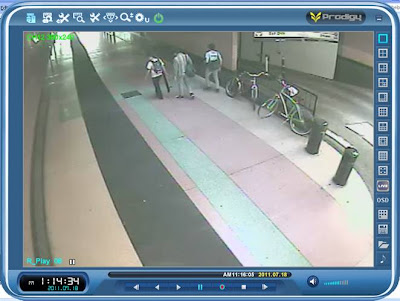

I think we look like celebrities.
-----
Anyway back in the office...
Evan took a look at my overall animations. I've been editing the curves for a while now.
He gave me advice to tweak a little more before it's qualified as a finalized animation.

Most of the curves are smoother than before.
Now that's an achievement.
I'll continue perfecting the overall animation.
Hopefully I can get it finalized by today.
New animation notes:
Frame 615 - 625 (1st machineGun victim boom)
Frame 635 - 645 (2nd machineGun victim boom)
----
The animation is almost finalized.
I'll ask Evan to check it out tomorrow whenever he's free.
I've proceeded on to a little bit of lighting.
I've left the work station on overnight to batch render another fresh sequence with new lightings and textures..


Today started off with us being caught on camera.
We're not supposed to park bikes at that area!


I think we look like celebrities.
-----
Anyway back in the office...
Evan took a look at my overall animations. I've been editing the curves for a while now.
He gave me advice to tweak a little more before it's qualified as a finalized animation.

Most of the curves are smoother than before.
Now that's an achievement.
I'll continue perfecting the overall animation.
Hopefully I can get it finalized by today.
New animation notes:
Frame 615 - 625 (1st machineGun victim boom)
Frame 635 - 645 (2nd machineGun victim boom)
----
The animation is almost finalized.
I'll ask Evan to check it out tomorrow whenever he's free.
I've proceeded on to a little bit of lighting.
I've left the work station on overnight to batch render another fresh sequence with new lightings and textures..


Sunday, July 17, 2011
Weekend 6
Once again this weekend is yet another weekend filled with thrilling physical activities. Skated, fell, got injured, skated some more and fell some more.
Skateboarding is FUN!
We taught Tanner how to ride a bicycle for about 10 minutes and he got it immediately. So we cycled and skated around the neighbourhood and went on further to ralph's and marukai.
After having much enriching experience in skating around Santa Monica for a couple of weeks, I've decided to get another customized skate deck for tricks. The one which I have now has it's 52mm trick wheels replaced with 60mm cruising ones.
I'm gonna spend my free time in L.A. practicing ollies and 180s.
Getting ready for another grueling week ahead.
Things are gonna get ugly but I'll make sure that I'll get through till the end...
With the success of project Hellfire of course!
Once again this weekend is yet another weekend filled with thrilling physical activities. Skated, fell, got injured, skated some more and fell some more.
Skateboarding is FUN!
We taught Tanner how to ride a bicycle for about 10 minutes and he got it immediately. So we cycled and skated around the neighbourhood and went on further to ralph's and marukai.
After having much enriching experience in skating around Santa Monica for a couple of weeks, I've decided to get another customized skate deck for tricks. The one which I have now has it's 52mm trick wheels replaced with 60mm cruising ones.
I'm gonna spend my free time in L.A. practicing ollies and 180s.
Getting ready for another grueling week ahead.
Things are gonna get ugly but I'll make sure that I'll get through till the end...
With the success of project Hellfire of course!
Friday, July 15, 2011
Day 25
Evan provided great help today.

He taught me proper animating of cameras and characters using curves.
He gave me a lot of tips and advices on how camera movements should go about in the scene.
Animation tips to take note of:
1) Always imagine the camera is being hand-held by an actual person.
2) Switch between using curves and camera lock translation & rotations.
Looks like I'm slightly behind schedule.
Well in every adventure there's a twist right?
Looks like I've got myself a busy week next week.
Evan provided great help today.

He taught me proper animating of cameras and characters using curves.
He gave me a lot of tips and advices on how camera movements should go about in the scene.
Animation tips to take note of:
1) Always imagine the camera is being hand-held by an actual person.
2) Switch between using curves and camera lock translation & rotations.
Looks like I'm slightly behind schedule.
Well in every adventure there's a twist right?
Looks like I've got myself a busy week next week.
Thursday, July 14, 2011
Day 24
It's about 12 midnight now so I figured I might as well get ready today's post.
Here's a batch render sneak preview, my flipbook test render. No batch render for now, gotta wait till I get back to the office later in the morning to collect the sequence I left to batch render overnight.
It's about 12 midnight now so I figured I might as well get ready today's post.
Here's a batch render sneak preview, my flipbook test render. No batch render for now, gotta wait till I get back to the office later in the morning to collect the sequence I left to batch render overnight.
-----
It's about 2.10pm in Santa Monica now.
Things are pretty hectic for me.
All positive attitude aside, I have absolutely no bloody idea where to start.
With a usual positive attitude however I'll tell myself all the project issues I'm facing now will be solved soon.
Well it HAS TO BE SOLVED BY THE END OF THIS WEEK!!!
Anyway here are a couple of issues I've found in the latest batch render test 3:
1) Raytrace shadows still didn't have motion blur.
2) Dust sprites still not showing up from the back of the convoy.
3) Finalization of apache and camera animation still uncertain.
With that, I've currently started another batch render with these solutions...
Solutions:
1) Raytrace motion blur checked and enabled in mantra render node.
2) Sprites for convoy dust particles test rendered and fixed.
3) Animation still uncertain, I'll discuss this issue with Steven and Mr Ari. I'll get animation advice from Evan too.
Alright so I'm gonna approach Steven and Mr Ari regarding my final camera and animation.
Also I can't render out the composited png sequence from after effects because apparently there's something wrong with my png sequence even though I don't see any problem when viewing the frames individually!
Wednesday, July 13, 2011
Day 23
Looks like I have to re-edit my production schedule once again due to unforseen circumstances.
Firstly, Side Effects will be going over to SIGRAPH in august.
At the same time, we're planning to go to vegas during that week.
Thus I'm gonna cut off 1 week from the production schedule.
So I'm left with about less than 5 weeks to complete project hellfire.
Damn.
Let's DO IT!
Here's a 2nd test batch render sequence rendered overnight.
Project Hellfire: Shot 02 Test Batch Render 02
Artist: Bryan Isaac Emmanuel
It's a slight improvement, I'm gonna tweak the overall animation (apache and camera) one last time. After that it'll be finalized.
The previous batch render took 17hours 30minutes to render believe it or not. Furthermore I had to interrupt the rendering at frame 770 since it was taking too long.
This batch render however finished rendering by the time I came into the office this morning.
Why the time difference?
In the previous sequence I rendered using ray-traced shadows.
In the 2nd batch render I used depth map shadows. However the depth map shadows are screwing around in the scene if you notice that huge shadow box casted randomly in the center of nowhere.
Issues to solve today:
1) That big square patch of shadow in the scene is getting on my nerves, I'm so gonna remove it.
2) Get a geometry road up and running for the convoy to sit their asses on.
3) Create a network of particles emission from machine gun turret.
4) Dust particles emission from the back of the convoy.
5) Secondary heightmap for "matte painting" background.
That's kinda what I plan to finish by today.
Followed by another test batch render overnight tonight.
Looks like I have to re-edit my production schedule once again due to unforseen circumstances.
Firstly, Side Effects will be going over to SIGRAPH in august.
At the same time, we're planning to go to vegas during that week.
Thus I'm gonna cut off 1 week from the production schedule.
So I'm left with about less than 5 weeks to complete project hellfire.
Damn.
Let's DO IT!
Here's a 2nd test batch render sequence rendered overnight.
Project Hellfire: Shot 02 Test Batch Render 02
Artist: Bryan Isaac Emmanuel
It's a slight improvement, I'm gonna tweak the overall animation (apache and camera) one last time. After that it'll be finalized.
The previous batch render took 17hours 30minutes to render believe it or not. Furthermore I had to interrupt the rendering at frame 770 since it was taking too long.
This batch render however finished rendering by the time I came into the office this morning.
Why the time difference?
In the previous sequence I rendered using ray-traced shadows.
In the 2nd batch render I used depth map shadows. However the depth map shadows are screwing around in the scene if you notice that huge shadow box casted randomly in the center of nowhere.
Issues to solve today:
1) That big square patch of shadow in the scene is getting on my nerves, I'm so gonna remove it.
2) Get a geometry road up and running for the convoy to sit their asses on.
3) Create a network of particles emission from machine gun turret.
4) Dust particles emission from the back of the convoy.
5) Secondary heightmap for "matte painting" background.
That's kinda what I plan to finish by today.
Followed by another test batch render overnight tonight.
Subscribe to:
Posts (Atom)